Blog

  • Homemade pizza sauce

    Skip the Jar and Make Your Own Easy Pizza Sauce
    A great pizza needs a great sauce. While store-bought jars are convenient, making your own at home is surprisingly easy and delivers a fresh, vibrant flavor that simply can’t be matched. This recipe is a game-changer. It’s incredibly simple, requires no cooking, and comes together in just a few minutes with an immersion blender. The result is a thick, rich sauce with just the right balance of sweet, savory, and herby notes that will elevate your homemade pizza to a whole new level.
    This recipe makes enough sauce for two large pizzas, which is perfect for a big family pizza night or for freezing half for later. So, grab your ingredients and get ready to create the perfect foundation for your next culinary masterpiece.
    Easy No-Cook Pizza Sauce
    Ingredients

    • 1 (14.5 ounce) can organic diced tomatoes
    • 1 (6 ounce) can organic tomato paste
    • 1/2 teaspoon organic cane sugar
    • 1 teaspoon Redmond’s salt (or other sea salt)
    • 1/2 teaspoon organic onion powder
    • 1/2 teaspoon organic garlic powder
    • 2 tablespoons organic Italian seasoning
    • 1 tablespoon olive oil
      Instructions
    • In a medium bowl or a large glass measuring cup, combine the canned diced tomatoes, tomato paste, cane sugar, salt, onion powder, garlic powder, Italian seasoning, and olive oil.
    • Using an immersion blender, blend all the ingredients until the sauce is smooth and no large chunks of tomato remain. You can also use a regular blender, but an immersion blender makes for a quick and easy cleanup.
    • Taste the sauce and adjust the seasonings if needed. If you prefer a smoother sauce, blend for a little longer.
    • This recipe makes enough sauce for two large pizzas. Use it right away or store it in an airtight container in the refrigerator for up to a week.
    • To freeze for later, portion the sauce into freezer-safe containers or bags and store it in the freezer for up to three months. Simply thaw in the refrigerator before using.
  • Homemade pizza crust

    Homemade pizza with onions, mushrooms, jalapeños, peppers and pepperoni.


    Is there anything better than a homemade pizza night? The smell of baking dough, the bubbling cheese, and the endless possibilities for toppings make it a fun and delicious tradition. The secret to a truly great homemade pizza isn’t just the sauce or the cheese—it’s the crust. This recipe for a simple, yet delicious pizza crust is a game-changer. It’s designed to be light and airy on the inside with a perfect chew on the outside, and it’s easy enough for even a beginner baker to master.
    The key to a good dough is patience. Giving the yeast time to “bloom” and the dough time to rise properly is what creates that incredible texture and flavor. This recipe uses a stand mixer to make the kneading process effortless, but you can absolutely knead it by hand as well. Get ready to ditch the takeout menu and create your new favorite pizza night tradition.
    Homemade Pizza Crust
    Ingredients

    • 2 packets (about 4.5 teaspoons) active dry yeast
    • 2 teaspoons organic cane sugar
    • 1.5 – 2 cups warm water (105-115^\circF)
    • 4 cups organic all-purpose flour
    • 1 teaspoon Redmond’s salt (or other sea salt)
    • 1/2 teaspoon organic garlic powder
    • 2 tablespoons olive oil
      Instructions
    • In a small bowl, combine the yeast, sugar, and 1.5 cups of warm water. Let the mixture sit for 5-10 minutes, or until the yeast is foamy and bubbly. This is called “blooming” the yeast and it confirms that it’s active and ready to go.
    • In the bowl of a stand mixer fitted with a dough hook, combine the flour, salt, garlic powder, and olive oil.
    • With the mixer on low speed, slowly pour the yeast mixture into the dry ingredients. If the dough seems too dry, add a little more warm water, one tablespoon at a time, until it comes together.
    • Increase the mixer speed to medium and knead the dough for 5 minutes, or until it forms a smooth, elastic ball.
    • Lightly oil a large bowl. Transfer the dough ball to the bowl and turn it once to coat. Cover the bowl with a warm, damp kitchen towel.
    • Place the bowl in a warm place and let the dough rise for 1-2 hours, or until it has doubled in size.
    • Once the dough has risen, punch it down gently to release the air. At this point, you can divide the dough for multiple pizzas or use it all for one large one.
    • Preheat your oven to 425°F (220°C).
    • Roll out the dough on a lightly floured surface to your desired thickness and shape. Transfer it to a pizza pan or a baking sheet.
    • To prevent a soggy crust, you can par-bake the crust for about 10 minutes before adding your toppings.
    • Add your favorite sauce, cheese, and toppings.
    • Bake for 15-20 minutes, or until the crust is golden brown and the cheese is melted and bubbly. The total baking time will vary depending on your oven and toppings.
  • Simple biscuits and gravy

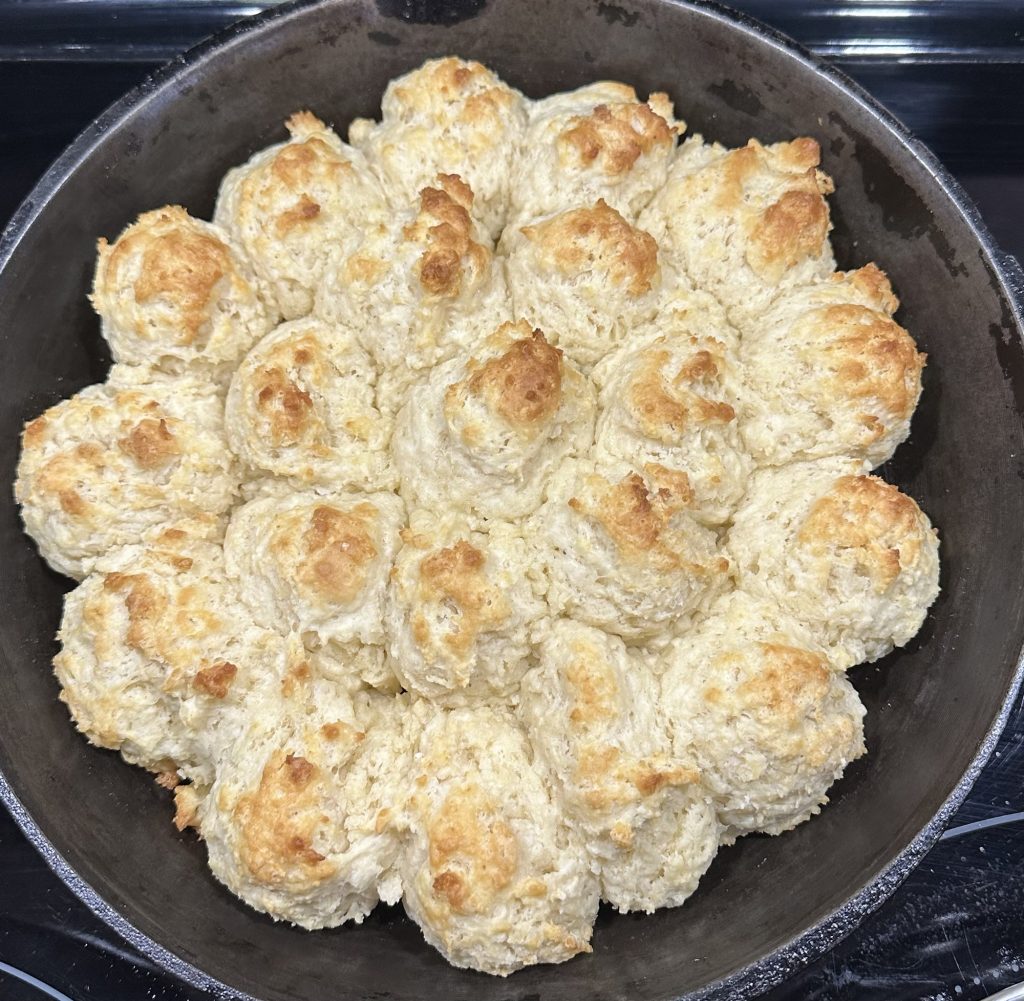
    Drop biscuits

    The Ultimate Comfort Food: Fluffy Drop Biscuits and Creamy Sausage Gravy
    There’s something truly special about a plate of warm, flaky biscuits smothered in rich, creamy sausage gravy. It’s the kind of meal that brings everyone to the table and feels like a big, comforting hug. While it may seem intimidating to make from scratch, this recipe is incredibly simple, with no kneading or rolling required. These drop biscuits come together in minutes and bake up into perfect golden clouds. Paired with a savory, flavorful sausage gravy, you’ll have a breakfast or dinner that will become a family favorite.
    Drop Biscuits
    This easy recipe uses a grater to get the butter perfectly distributed into the flour, which is the secret to creating those fluffy, tender biscuits with minimal effort.
    Ingredients

    • 2 cups organic flour
    • 1 tablespoon baking powder
    • 1 teaspoon salt
    • 1/2 cup cold butter
    • 1 cup raw milk
      Instructions
    • Preheat your oven to 450°F (230°C).
    • In a large bowl, whisk together the flour, baking powder, and salt.
    • Using a grater, grate the cold butter directly into the flour mixture. Use your fingers to lightly mix the butter into the flour until it resembles coarse crumbs.
    • Pour in the raw milk and stir until just combined. The dough will be thick and shaggy. Be careful not to overmix.
    • Using a cookie scoop or a large spoon, drop scoops of the biscuit dough onto a cast iron pan or a baking sheet.
    • Bake for 17 minutes, or until the biscuits are golden brown and cooked through.
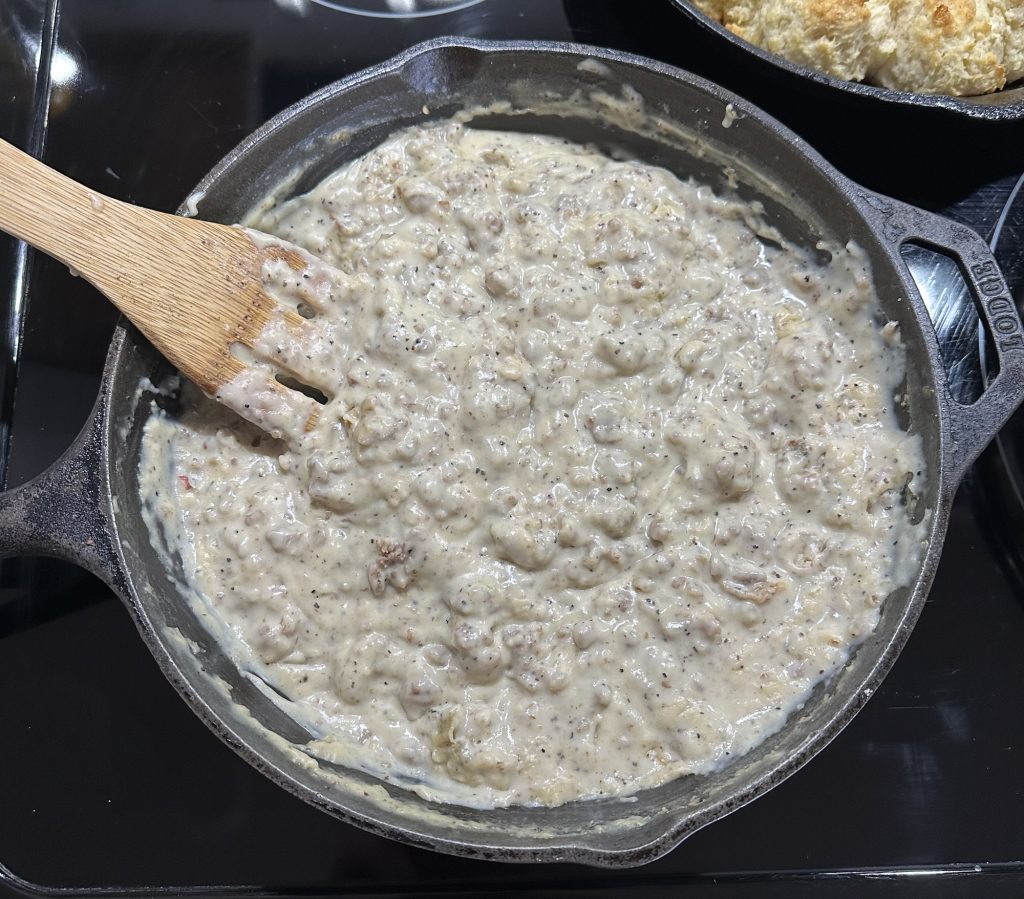
      Sausage Gravy
      While your biscuits are baking, you can whip up this rich and creamy gravy. The key is to brown the sausage well and stir continuously as you add the milk to prevent lumps.
      Ingredients
    • 1 lb ground sausage
    • 1/4 teaspoon ground sage
    • 1 teaspoon Redmond’s salt
    • 2 teaspoons black pepper
    • 6 tablespoons organic flour
    • 2 tablespoons butter
    • 3 cups raw milk
      Instructions
    • In a large skillet over medium-high heat, brown the ground sausage. Break it up with a spoon as it cooks.
    • Once the sausage is cooked through, add the butter, sage, salt, and pepper. Stir until the butter is melted and everything is well combined.
    • Sprinkle the flour over the sausage mixture and stir for about a minute to cook the raw flour taste out.
    • Slowly pour in the milk, stirring continuously to prevent lumps from forming.
    • Bring the mixture to a simmer, stirring constantly. The gravy will thicken as it cooks. Continue to stir until it reaches your desired consistency.
    • Serve the warm gravy generously over the freshly baked drop biscuits.
      This meal is pure comfort in a pan.i
    • What’s your favorite occasion to make biscuits and gravy?
    Sausage gravy
    Add some extra protein by adding a few eggs over easy!
  • The BEST Pickled Jalapeños

    Are you ready to add a vibrant, spicy, and tangy punch to your favorite dishes? Look no further than homemade pickled jalapeños! Forget the store-bought versions; making your own is surprisingly simple and yields a far better flavor. These little beauties are perfect for topping tacos, nachos, sandwiches, salads, or anything else that could use a zesty kick. Our family fav is putting them in homemade hamburgers! 

    Why Make Your Own Pickled Jalapeños?

    Beyond the incredible flavor, there are several reasons to whip up a batch of these fiery gems:

    • Customizable Heat: You control the spice! Want them milder? Remove more seeds. Crave an extra kick? Leave some in. I love the extra kick so we leave all the seeds.
    • Freshness You Can Taste: When you make them at home, you’re getting the freshest possible ingredients, leading to a brighter, cleaner taste.
    • No Preservatives: You know exactly what’s going into your jars – just simple, natural ingredients.
    • Surprisingly Easy: If you can boil water, you can make pickled jalapeños!
    I always quadruple my recipe to share with family and friends!

    Your Go-To Recipe: Pickled Jalapeños

    This recipe is a tried-and-true winner, delivering perfectly balanced pickled jalapeños every time.

    Yields: 2 pint-size jars or 1 quart-size jar Prep time: 15 minutes Cook time: 15-20 minutes

    Ingredients

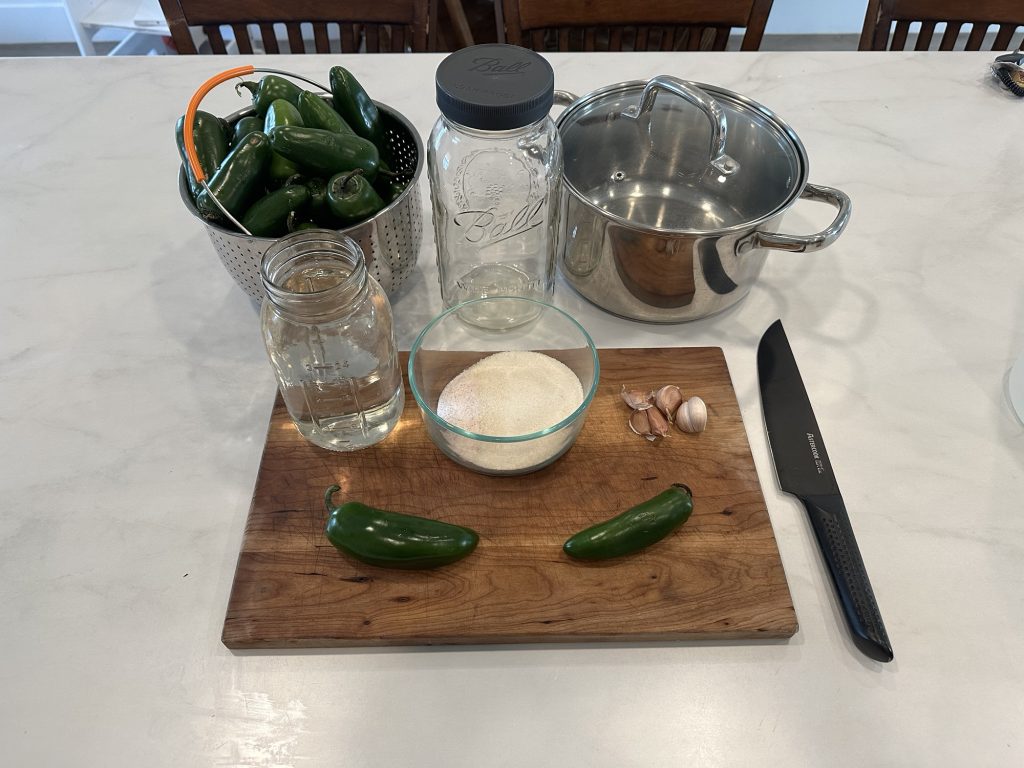
    • 1 pound jalapeños, stems removed and thinly sliced
    • 2 garlic cloves, smashed and peeled
    • 1 cup distilled white vinegar
    • 1 cup water
    • ¼ cup granulated sugar
    • 2 tablespoons kosher salt

    Instructions

    1. In a medium saucepan, combine the garlic, water, vinegar, sugar, and salt.
    2. Heat the mixture to a boil, stirring constantly to ensure the sugar and salt completely dissolve.
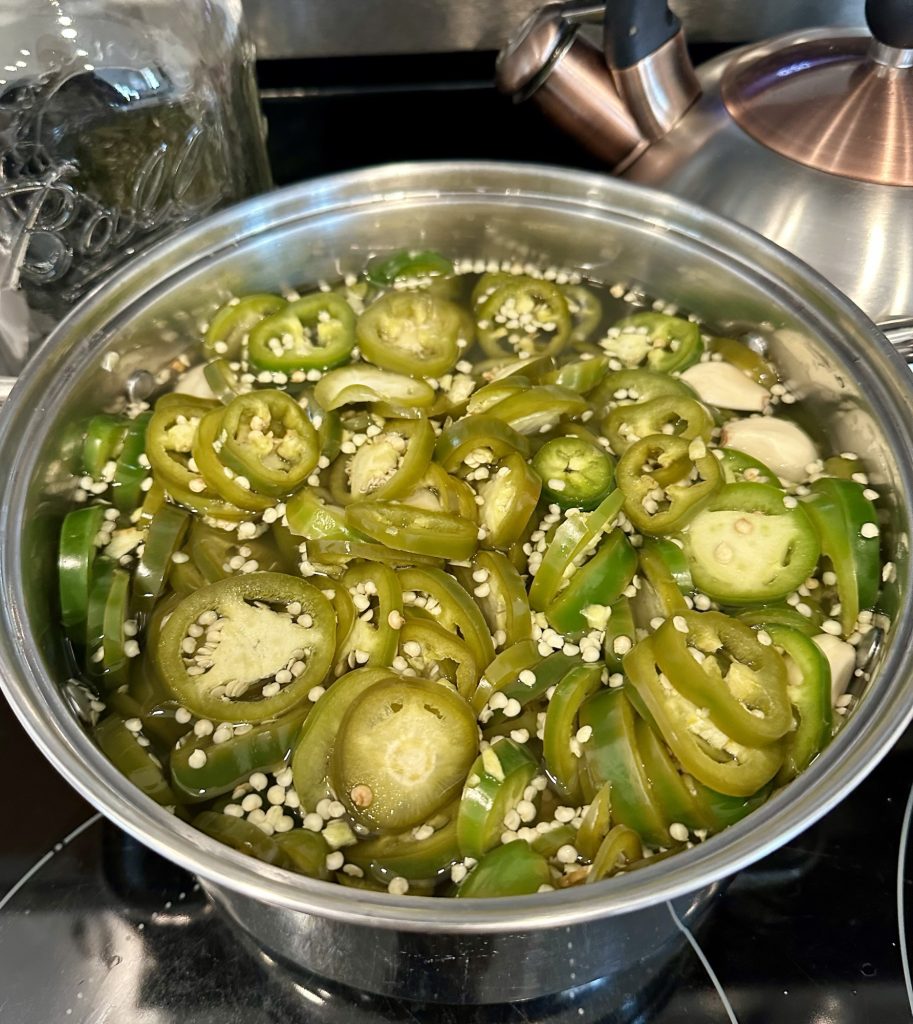
    3. Once boiling, add the thinly sliced jalapeños. Gently press them down so they are fully submerged in the brine.
    4. Remove the pot from the heat and let it sit for 10 to 15 minutes. During this time, occasionally stir and press the jalapeños into the brine to ensure even pickling.
    5. Carefully transfer the jalapeños to 2 pint-size jars or 1 quart-size jar.
    6. Ladle the hot brine over the jalapeños until the jar is full. (Pro Tip: Doing this over a small strainer will help remove the bulk of the excess seeds, if you prefer fewer in your finished product.)
    7. Let the jars cool at room temperature before securing a lid. Once cooled, pop them into the fridge.
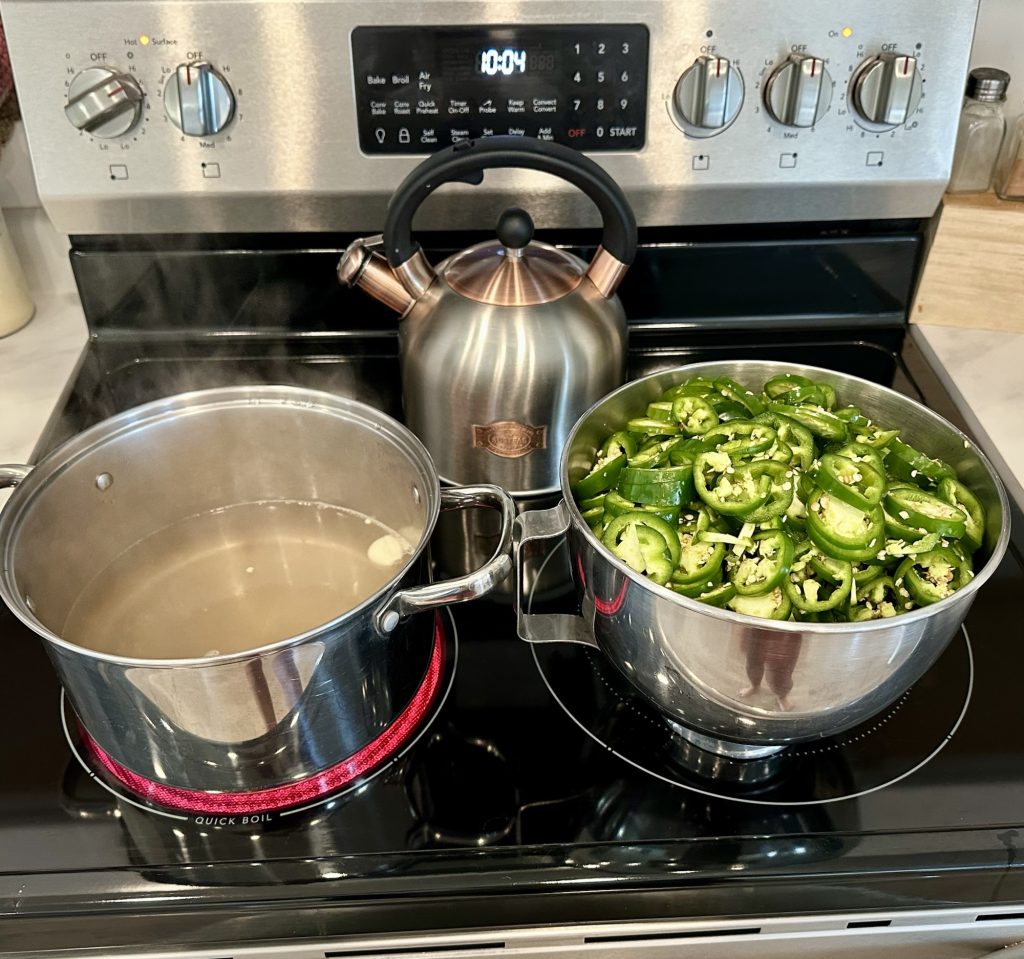
    Chop the jalapeños 1/4 inch thick.
    Boil the sugar, salt, garlic, vinegar and water until sugar and salt are dissolved. Then turn off the heat.
    Pour jalapeños into the hot liquid and press them down until submerged. Place lid on and let sit until they turn a paler green.
    Let cool slightly then place in sterilized jars. Place in the counter until completely cooled then transfer to the fridge!

    Storing Your Pickled Perfection

    These pickled jalapeños will last for several weeks (even months!) in the refrigerator. The flavor will deepen and mellow over time, so don’t be afraid to make a larger batch!

    How Will You Enjoy Them?

    Now for the fun part: enjoying your homemade pickled jalapeños! Here are just a few ideas to get you started:

    • Taco Topping: An absolute classic!
    • Nachos & Quesadillas: Adds a bright, tangy contrast to rich cheese.
    • Sandwiches & Burgers: Elevate your everyday lunch.
    • Salads: Chop them up and toss them in for a surprising burst of flavor.
    • Eggs: A few slices on your scrambled eggs or omelet in the morning is a game-changer.
    • Cocktails: Muddle a few for a spicy margarita or bloody mary!

    So, what are you waiting for? Grab some jalapeños and get pickling! You’ll be amazed at how easy it is to create such a versatile and delicious condiment right in your own kitchen.

    What’s your favorite way to use pickled jalapeños? Share your ideas in the comments below!